Return to flip book view
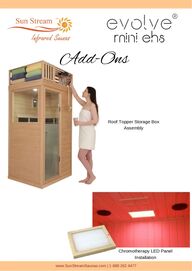
Add-Ons www.SunStreamSaunas.com | 1-888 262 4477Roof Topper Storage BoxAssemblyChromotherapy LED PanelInstallation
Evolve Mini EHSRoof Topper Storage BoxAssemblywww.SunStreamSaunas.com | 1-888 262 4477Back PanelBottom Panel Top PanelEnd Panels
www.SunStreamSaunas.com | 1-888 262 4477Lay the Back Panel flat onyour work tableAttach the Bottom Panel tothe Back Panel with 2supplied screwsAttach one of the End Panels tothe Bottom Panel with 2 screws
www.SunStreamSaunas.com | 1-888 262 4477Continue to attach the EndPanel to the Bottom PanelAttach the Top Panel to theEnd Panel and the BottomPanel
www.SunStreamSaunas.com | 1-888 262 4477Attach the second End Panel to the Top PanelComplete the box assembly byattaching the End Panel to theBack Panel and the Bottom Panel
With the 2 boxes assembled, placethem on roof of the Mini sauna alongthe front and right hand sides of thesauna.Secure the 2 boxes together with 4screws as shown.It is advised to predrill pilot holes forthe 4 screws to avoid splitting of thewood It is advised that the 2 boxes besecured to the roof of the saunawith 4 screws.Predrill pilot holes for thescrews into the roof to avoidsplitting of the roof boards Enjoy your new Evolve Mini EHSInfrared sauna & Roof Topper Storage Box !www.SunStreamSaunas.com | 1-888 262 4477
Remove the roof from the sauna and place the roof on a work table or floor with the top of roof(outside) facing up.Remove the T&G cover from the top of the roof. Phillips screwdriver or cordless drill required.Identify the spare 12V DC power supply wire inside the roof with a barrel connector on the end.The power supply wire may be bundled up and tucked off to the side inside the roofFlip the roof over with the ceiling (inside of roof) facing up on your work table.Identify the power connection on the backside of the LED panel. Position the LED panel on theceiling in the desired position and, on the ceiling, mark the outer corner of the LED panel(power connection corner) with a pencil.Remove the LED panel from the ceiling. With your pencil, mark the spot on the ceiling to drillthe hole for the power line to connect to the back of the LED panel. The center of your holeshould be 3.5cm (1 3/8") from the long side of the LED panel and 3.5cm (1 3/8") in from theshort side.Drill the hole for the power line in the ceiling. Drill bit size min 3/8" diameter (preferably 7/16"). Itis advised to first drill a smaller hole (ie 1/4") then enlarge the hole with your 3/8" or 7/16" drillbitDrill 2 pilot holes in the ceiling (smaller diameter than the included screws) for the 2 mountingscrews (so not to split the ceiling T&G boards).Feed the 12V power line through your 3/8" (or 7/16") ceiling hole to connect to the back of theLED panel. Insert the power line's barrel connector into the back of the LED panel.Mount the LED panel on the ceiling with the 2 mounting screws.PLEASE NOTE: The remote control for the LED panel has a short-range and must be pointeddirectly at the LED panel usually from within the sauna. www.SunStreamSaunas.com | 1-888 262 4477Chromotherapy LED Panel Installation